
Creating Personalized Slippers Using An Embroidery Machine
Embroidery Machines and Their Limits: I operate on a 5″x7″ embroidery machine which doesn’t have a free arm, implying I can only work with items laid flat beneath the machine. The joy of discovering blanks like ones that unzip or unroll for easy embroidering is beyond words. Imagine my excitement upon discovering slipper blanks tailored for my kind of machine! Time to dive into the how-to of embroidering slippers!
1. Choosing the Right Slippers
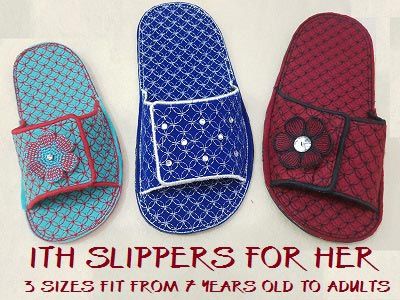
Those lucky enough to have a multi-needle machine with a free arm can adapt any slipper style. But for me, the trick is to find house slippers that come with hook and loop fasteners. My personal favorite are the soft, terry fabric spa slippers from All About Blanks. Shopping around, especially on sites like Amazon, can also yield choices like microsuede or velvet slippers, and even the plush spa slippers with Memory Foam. Always ensure the strap opens up and lacks fasteners in the embroidery zone.
2. Stabilization is Key
Slipper straps are notoriously hard to hoop, so they need to be stabilized to avoid movement during embroidery. My go-to is the sticky, self-adhesive tear-away stabilizer. However, it’s essential to test it first, especially with delicate fabrics, to avoid damage. Alternate options include the sticky wash-away or the Odif 505 combined with a basting box or pins. Remember, if the fabric of your slipper has texture, a water-soluble topping like Sulky Solvy comes in handy.
3. Thread Selection
Though cotton thread has a certain appeal, its bulkiness may not be ideal for smaller designs on toddler shoes. My pick is the 40wt polyester embroidery thread, especially the DIME Exquisite threads. But rayon or a finer cotton thread can be alternate choices.
4. The Perfect Needle
For my projects, the 75/11 embroidery machine needle (I used the gold Schmetz) was efficient. If you face any hiccups, you might want to consider needle size variations or sharper needles.
5. Tools for Marking and Finishing
Have your marking tools, measurement instruments, and embroidery scissors at hand for a seamless process.
Embroidering Your Slippers: Step-by-Step Guide
1. Marking the Embroidery Area:
With a water-soluble pen or target sticker, mark the desired embroidery center. While I had to estimate the fit on my daughter’s foot for horizontal alignment, vertically, I aligned my design with the slipper’s top. Ensure your design doesn’t span too widely to avoid machine head interference.
2. Affixing Slipper to Stabilizer:
Hoop your stabilizer choice and strip off its paper layer. Drawing a central line aids in aligning the slippers. A pro-tip: I also mark the design top on my shoe to avoid stitching blunders later. Orienting the bulk of your embroidery item towards the machine’s exterior usually yields better results.
3. Machine Setup and Embroidery:
Insert the hoop, load your desired embroidery pattern (I got mine from Blasto Stitch) and rotate as per your hooped slipper. Align the needle with the design center, ensure the slipper sole won’t interfere, and off you go! Monitor closely to prevent mishaps. Ensure there’s clearance for the needle threader; I had one color on my tiger design too close to the sole, requiring manual threading.
4. Final Touches:
After embroidery, gently peel off the stabilizer. Avoid abrupt movements to protect the slipper interior. Snip off excess threads and dissolve the water-soluble topping with water, which also erases embroidery marking. Admire your handiwork once dry!
Table Summary:
| Steps | Description |
|---|---|
| Machine Type | 5″x7″ without a free arm |
| Slipper Type | House slippers with hook and loop fasteners |
| Stabilizer | Sticky, self-adhesive tear-away or wash-away |
| Thread | 40wt polyester embroidery thread |
| Needle | 75/11 embroidery machine needle |