
Cutting Fabric with the Brother ScanNCut – A Comprehensive Guide
If you’ve been struggling to get the most out of your Brother ScanNCut, you’re not alone. While it’s a powerful tool, it comes with a learning curve. Today, let’s dive into some pro tips and tricks for fabric cutting with this amazing machine.
The Journey with the Brother ScanNCut
Though the Brother ScanNCut is packed with features, mastering it was not a walk in the park. With limited guidance from the manual and fewer online resources compared to other machines, it was a combination of persistence, conversations with Brother, and invaluable insights from my local sewing shop that unlocked its potential.
Unleashing Your Creativity with the ScanNCut ✨
When it comes to fabrics, here are some inspirations to set your creative wheels in motion:
- Applique: The ScanNCut excels in creating clean fabric cuts, essential for both sewing and machine embroidery appliques. Impressively, some models, like the Brother SDX330D, even sync wirelessly with Brother embroidery machines and support various file formats!
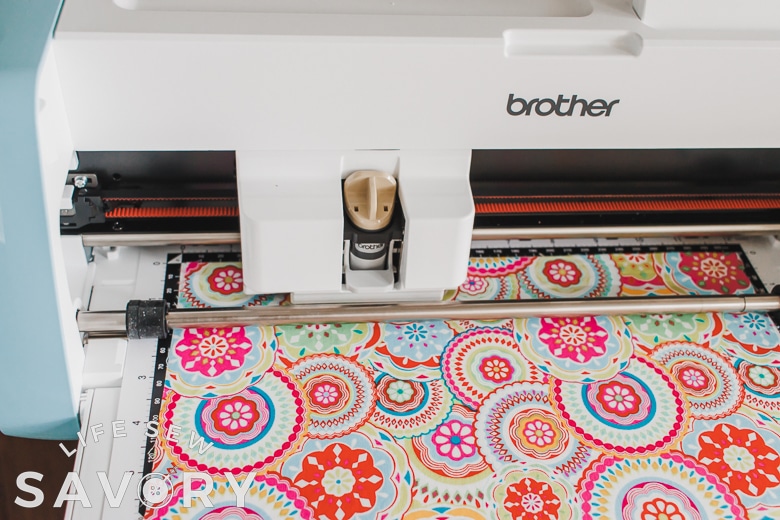
- Quilt Pieces: With over 100 built-in quilt designs and the ability to scan and customize, the ScanNCut is your quilting buddy. The machine’s compatibility with Electric Quilt 8 software is an added perk!
- Pattern Pieces: The scanning mat allows for precision cuts, especially for those intricate designs. It’s a boon for those looking for accuracy over speed.
- Other Sewing Endeavors: From English Paper Piecing templates to free-motion quilting template stencils, the ScanNCut is versatile. Plus, with the right pen, you can mark your fabric with ease!
Getting the Right Mix: Blades, Mats, and Backings
Understanding the perfect combination of tools and supplies is crucial. Whether it’s backed or unbacked fabric, the Brother ScanNCut DX has various methods to ensure clean cuts. Furthermore, the choice of ScanNCut models, from Brother DX/SDX to CM, affects the cutting process. Each model comes with its set of compatible blades and mats, adding layers of complexity. But fear not! Here’s a breakdown to simplify things:
| Type | Tools & Supplies |
|---|---|
| Backed Fabric (e.g., Applique) |
|
| Unbacked Fabric (e.g., Quilt Pieces) |
|
Blades for the Fabric Job
From manual blades for CM series machines to the advanced Rotary Auto Blade for DX models, there’s a blade for every fabric type and cutting need. Backing and high tack support sheets further enhance cutting precision by providing stability to fabrics.
A Step-by-Step Guide
For a seamless experience with your Brother ScanNCut DX:
- Press Fabric: Use an iron to smoothen out wrinkles. A stiffener can help with thinner fabrics.
- Adhere Backing: Attach the backing to your fabric with an iron.
- Trim & Prepare Fabric: Remove excess material and backing paper.
- Place Fabric on Mat: Ensure it’s aligned and sticks well.
- Edit Design: Customize before cutting, ensuring optimal settings.
- Start Cutting: Load your design and get cutting! A test cut might be a good idea.
- Retrieve Your Creation: Once done, gently remove the fabric pieces from the mat.
For quilt pieces, remember to account for seam allowances, use consistent pressing methods, handle the fabric carefully, and use the right fabric side for marking.
The Power of the High Tack Adhesive Support Sheet
For fabrics without backing, the High Tack Adhesive Support Sheet is a lifesaver. By enhancing the stickiness of the mat, it ensures precision and cleanliness in cutting. It’s easily applied and removed from the Standard Tack Mat, and its reusability makes it a cost-effective choice.