
A Creative Solution to a Sliding Sewing Machine Foot Pedal!
Hey there, I’m Luna, a passionate fashion designer, and I adore crafting each piece of my creation from the ground up. If you’re anything like me, you might have faced the annoying issue of that pesky foot pedal skidding across the floor. The struggle is real, especially when that lightweight pedal takes on a life of its own and decides to dangle from the sewing table.
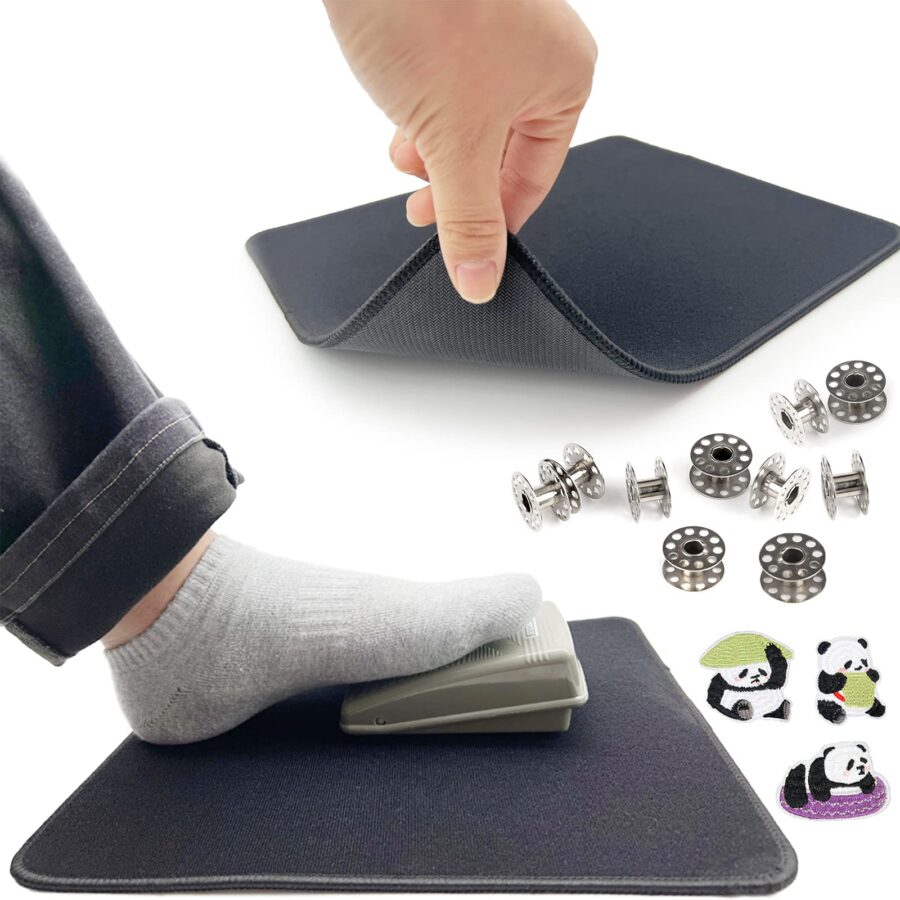
But fret not! I’ve come up with a nifty trick to keep it in place: turning a mouse pad into a non-slip foot pedal mat. Yup, you heard it right! I’ve tried it on both hardwood floors and carpets, and let me tell you, it’s a game-changer.
Features I Wanted in My Perfect Foot Controller Mat
- Rubbery and grippy base that won’t slip, regardless of the floor type.
- A sufficiently large size to accommodate various foot pedals from my collection.
- Flexibility to swap foot pedals whenever I use different sewing machines.
- And here’s a bonus: mouse pads with wrist supports act as a stopper to prevent that forward slide!
Just a quick note: I experimented with a couple of mouse pads, the Belkin WaveRest gel mouse pad and the Quality Selection one. Both were superb in grip. The Belkin was my favorite due to its larger size, though I jazzed it up a bit to hide the brand name.
Materials You’ll Need
- Mouse pad (I went with the Belkin one, but there are many out there that would do the trick)
- Adhesive hook and loop fastener sheets or strips
- Scissors ✂️
- Any decorative material to personalize the pad, if you wish!
Steps to Create Your Own Foot Pedal Mat
- Start by positioning the foot pedal on the mouse pad. The wrist support will act as a boundary for the pedal.
- Stick the hook side of the fastener on the mouse pad and the loop side under the foot pedal. Make sure they align perfectly.
- Press the two sides of the fastener together, and voila, a non-slip pedal pad!
- For added flair, I embroidered “Sew!” on pink fabric and glued it to the mouse pad. It took about 15 minutes but was well worth it!
One Year Later: My Thoughts
Having used this DIY pedal pad under my serger for a year, a little cleaning is occasionally needed due to dust. The hook and loop fasteners are still going strong, allowing me to switch foot pedals effortlessly. This simple hack turned out to be a cost-effective and successful solution!
| Important Details | Notes |
|---|---|
| Base Material | Mouse Pad |
| Non-Slip Feature | Adhesive hook and loop fasteners |
| Additional Decor | Embroidered “Sew!” on fabric |
| Duration of Creation | Approximately 16 minutes |
