
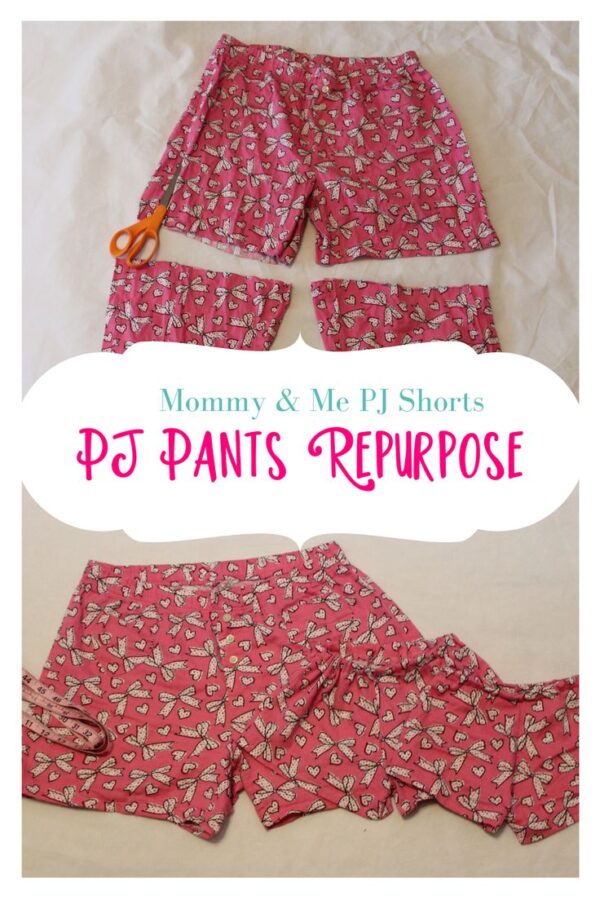
Have an old pair of pajama pants that’s shrunk or is just lying around? Why not turn them into chic shorts? Not only will I guide you through the process, but I’ll also share how I crafted Mommy & Me shorts for my daughters using the leftover fabric. No complex patterns required! I’ve got you covered.
As someone who adores refashioning and upcycling, I believe in breathing new life into old garments. There’ve been times I’ve goofed up while sewing. But guess what? Repurposing old clothes is the perfect way to experiment and learn. I stumbled upon a pair of pajama pants in my mom’s discard pile and couldn’t resist their fabric allure. Originally discarded due to shrinkage over washes, I decided they deserved a second chance!
Essentials for the Makeover
- Sewing machine (or just a needle and thread if you’re old school)
- Your old pajama pants that snugly fit your waist and bottom
- Scissors and markers
- A handy ruler or tape measure
- Pins or Wonder Clips (a personal favorite of mine!)
- An iron, for those who like precision in their seams
Creating Your New Pajama Shorts
Repurposing from pre-constructed pants makes this DIY super simple! If you’re a beginner, the existing elastic and fit of your pajama pants can save you a lot of time. Just measure, snip, and stitch!
Setting the Right Length
Firstly, wear your PJ pants and decide your shorts’ desired length. Use your ruler or tape to measure from the crotch to this chosen length and jot down the measurement. Now, lay your pants flat (ironing helps if they’re crinkled) and measure the previously decided length from the crotch. Add an extra 1/2″ for hemming. This method ensures a simple yet neat seam for our comfy home shorts.
Time to Cut
I marked my cutting line with a washable fabric pen, but choose what works best for you. The golden rule? Measure twice and cut once. A slip-up here is irreversible.
Stitching the Shorts
Flip your cut shorts inside-out. The leg openings will show the raw fabric edges. To prevent fraying, especially in cotton fabrics, these edges need neatening. I used an overcasting stitch for this, but a zigzag stitch works too. The next step involves hemming. Turn up the finished edge of the shorts by 1/2″, ensuring the raw edge remains on the inside. Pin, clip, or press this seam in place. Then, sew closely to the finished edge, which completes your hem. Give yourself a proud nod once you wear and see the transformation!
Extra Fabric? More Shorts!
I’m all for zero waste, so I utilized the extra leg fabric to craft matching shorts for my girls. By simply tracing around a pair of their well-fitted shorts, I had a makeshift pattern ready! Constructing the shorts involved stitching the panels together, hemming, and adding an elastic casing. And voila, matching shorts ready!
Key Takeaways
| Steps | Details |
|---|---|
| Choosing Old Pants | Select ones that fit around your waist and bottom. |
| Measuring | Measure desired shorts length from crotch. Add 1/2″ for hemming. |
| Cutting | Mark and cut carefully. Remember, no going back! |
| Sewing | Neaten raw edges and sew the hem. |
| Repurposing Extra Fabric | Use it to craft additional items like matching shorts. |