
Hey there! Whether you’re just diving into the world of sewing or you’ve been crafting masterpieces for years, threading a sewing machine needle can be a challenge for all. But, worry not! Luna’s here to spill the beans on her tried-and-true methods. ✨
Some might swear by automatic needle threaders, but guess what? They don’t come in handy when working with twin needles or sergers which need manual threading. Over time, I’ve gathered some nifty techniques and tools to make this process smooth as silk.
If you’re wondering how to thread sewing machines from brands like Singer or Brother, I’ve covered those in my previous posts. But today, let’s focus on the needle threading process.
Sometimes, even with the sharpest eyesight, the needle’s eye plays hard to get. That’s where my handy tips come into play. And, if you’re someone with not-so-great vision, check out my piece on tools to assist in sewing. Now, let’s dive into the details!
How Do You Thread a Sewing Machine Needle?
Always remember: the thread goes from the front to the back of the needle. Ensure you’re not twisting it while threading. For our newbies, the eye is that tiny hole near the needle’s tip. Use the thread from your machine’s top, not the bobbin at the bottom. After threading, pull the thread under and behind the presser foot (the part holding your fabric).
Setting Up Your Machine for Threading
- Needle Position: It’s easier when the needle is up. For computerized machines, there’s a button. On manual ones, use the handwheel or foot pedal. If your machine has an auto-threader, it’s likely it only operates in this position.
- Machine Power: If you’re just starting, turn off your machine for safety. You might lose the light, but an extra lamp can help. Once you’re a pro, choose whether to thread with the machine on or off.
- Presser Foot Adjustment: If threading seems tight, lower the presser foot or take it off entirely. Machines usually have levers for this – consult your manual if unsure.
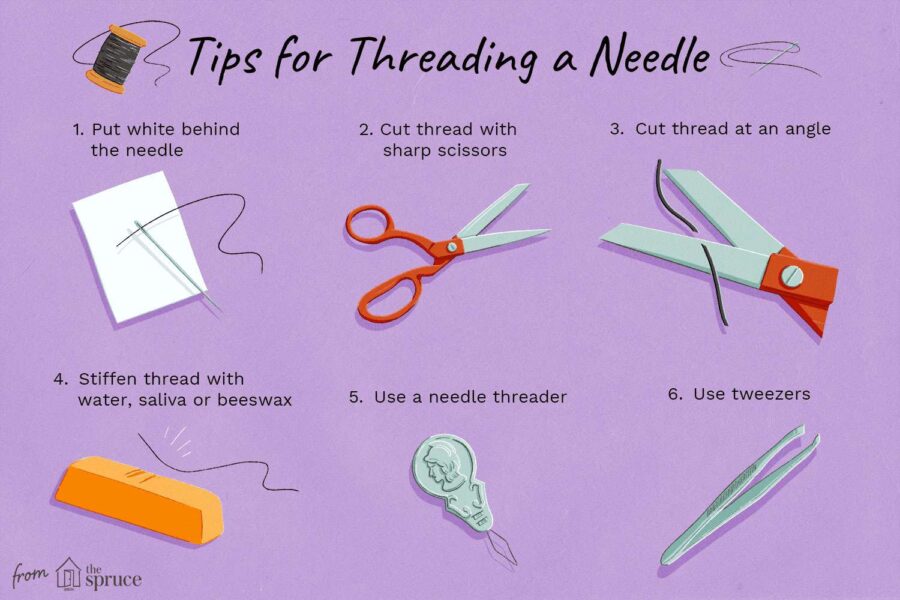
- Background Trick: Struggling to see the needle’s eye? Hold white paper behind it. The contrast helps!
Preparing the Thread
We’ve all struggled with frayed thread ends, right? The secret to threading success is ensuring the thread is smooth, strong, and consistent.
- Cutting the Ends: Snip off any uneven bits using sharp sewing scissors. Cutting at a slight angle helps.
- Thread Conditioning: When quick, I moisten the thread end (yep, the old-school way with a lick). But for a professional touch, I use Thread Magic. It not only reduces fraying but also strengthens the thread.
Methods to Thread a Sewing Machine Needle
With everything set, let’s explore the various threading techniques!
- By Hand: The classic method involves gently guiding the thread through the needle’s eye. Might require patience and a bit of dexterity.
- Using Threading Tools: There are many tools out there, but I favor the Dritz Needle Inserter and the silver wire loop tool. The Dritz is super effective for machines, while the wire loop tool is budget-friendly but slightly fragile.
- Self-Threading Needles: These needles by Schmetz come with a side slit to slip the thread in. They’re not my go-to because of limited sizes and potential thread slipping issues.
- Automatic Needle Threader: If your machine boasts this feature, it’s a breeze. Just make sure you use it right to avoid bending issues.
At a Glance
| Detail | Description |
|---|---|
| Thread Direction | Front to Back |
| Needle Position | Up |
| Machine Power | Off (For Beginners) |
| Presser Foot | Adjusted or Removed |
| Background Trick | White Paper |
| Threading Methods | By Hand, Threading Tools, Self-Threading Needles, Automatic Threader |