
Master the Art of Threading the Singer Heavy-Duty Sewing Machine
Hey there! I’m Luna, a fashion enthusiast and lover of creating designs from the very beginning. Let’s unravel the mystery of threading a Singer heavy-duty sewing machine, using my own Singer 4423 as a guide.
The threading methods for most Singer heavy-duty machines are alike. By the end of this guide, you should be threading like a pro! I’ve included a mix of vivid pictures and even a video tutorial to make your learning journey easier. While the official manuals might sometimes leave you scratching your head, these real-life images won’t.
Threading the Bobbin on Your Singer Heavy-Duty Machine
Kick things off by placing your thread spool on the spool pin. If you’re using a horizontal spool pin, ensure you have a spool holder on top to keep everything in place. Singer machines are pretty versatile when it comes to thread types!
Now, gently pull your thread through the initial thread guide. Feel that little ‘click’? That’s it settling in. Be careful not to pull it under the machine’s handle.
Your next step is to wind the thread around the bobbin winder tension discs. Ensure the thread snugly fits between the discs, winding it in a clockwise direction.
Thread the top of your Class 15 bobbin by pulling the thread end through its tiny hole. Position the bobbin on the spindle, pushing it to the right. Hold onto the thread end and gently push on the foot controller, winding the thread a couple of times around. Once that’s done, trim the free end of the thread.
With both hands free, step on the foot pedal with vigor! Wind the bobbin until it’s packed with thread. Cut off any excess thread, push the spindle back to the left, and take off the bobbin.
Inserting the Bobbin into a Singer Heavy-Duty Machine
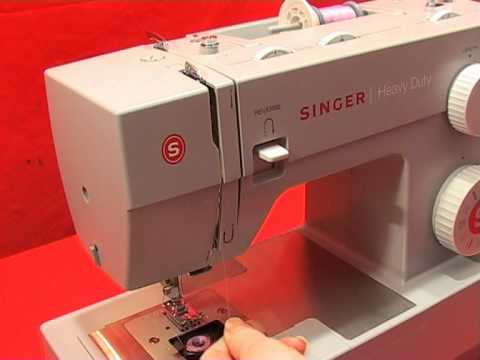
The modern Singer heavy-duty machines come with top-drop bobbins. To safely insert the bobbin, switch off your machine. Begin by removing the bobbin case cover by nudging the tab on the right.
Place the bobbin so the thread winds counterclockwise. At the 6 o’clock position on the bobbin case, you’ll notice a little slit. Gently pull the thread through this slit, pulling it counterclockwise. When you reach the tiny notch, pull the thread out. Ensure your bobbin stays still; use your finger if needed.
Finally, extend around 6 inches of thread from the bobbin and direct it to the machine’s backside. Securely close the bobbin cover.
Guiding the Upper Thread
Rotate the handwheel on the machine’s right side towards you, raising the needle to its peak. Remember to lift the presser foot. This little step is crucial to avoid tension problems later.
With the thread still on the spool pin and held by the thread spool holder, lead it through the initial thread guide. Continue by pulling the thread through the pre-tension spring and down the machine’s right channel.
Make a U-turn at the bottom and guide the thread up the left channel. There, you’ll find a thread takeup lever. Hook the thread onto it, guiding it from the right to left.
Descend the left channel once more, passing the thread through the horizontal thread guide and the needle clamp guide. Finally, thread the needle’s eye from its front to back.
Utilizing the Singer’s Automatic Needle Threader
If your Singer machine boasts an automatic needle threader, it’s about to make your life a tad bit easier. The eye of the needle should align perfectly with the threader’s hook. Adjust the stitch dial to the straight stitch, center needle position.
To activate the threader, pull its lever down and rotate it towards you. Let the hook of the threader slide into the needle’s eye. Next, loop the thread around the thread guide, looping it counterclockwise. Pull the thread against the threader’s hook to secure it in place.
Releasing the lever completes this step. A thread loop might appear at the needle’s back; pull the end towards the needle’s rear, leaving a few inches exposed.
Preparing the Bobbin Thread for Sewing
Before starting your sewing adventure, the bobbin thread needs to be raised. Hold the upper thread and turn the handwheel in your direction. As the needle goes down and rises again, the bobbin thread should follow.
A gentle pull on the upper thread will lift the bobbin thread through the hole. Draw both threads to the machine’s back, positioning them under the presser foot.
| Steps | Details |
|---|---|
| Bobbin Threading | Top of the machine, use Class 15 bobbin |
| Bobbin Insertion | Top-drop method, counterclockwise thread winding |
| Upper Thread Guide | Through pre-tension spring and both machine channels |
| Automatic Needle Threader | Align needle eye, rotate threader lever |
| Preparing to Sew | Hold upper thread, turn handwheel, and raise bobbin thread |