
Ever Thought About Embroidering Tulle? Let’s Dive In!
Embroidering on tulle? Absolutely possible! Don’t be intimidated by the idea of machine embroidery on this delicate fabric. You can achieve some truly mesmerizing results! Here’s my story: My little one wanted a homemade Elsa-inspired costume, and while the satin dress came out beautifully, the tulle cape felt a bit too… well, simple. But instead of using my Cricut Maker for HTV designs, I took a leap and ventured into embroidering on tulle. The outcome? A dazzling cape adorned with 15 meticulously embroidered snowflakes! Ready to embark on this journey? Let’s get started!
Your Essential Toolkit for Tulle Embroidery
- Embroidery hoop, machine, and scissors (I personally adore my Brother SE1900)
- Tulle (the star of our show!)
- Stabilizer: Opt for wash-away, not the clingy water-soluble types
- Needle: A 75/11 Schmetz embroidery needle worked wonders for me
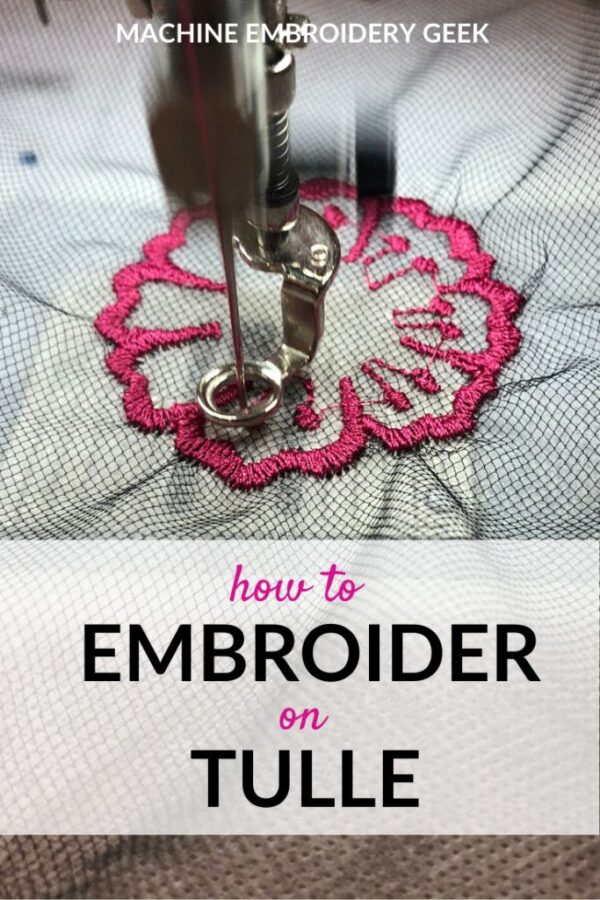
- Thread: I went with a 40 wt polyester top thread and a white 60 wt pre-wound bobbin thread. Remember to match your threads!
Selecting the Perfect Stabilizer for Tulle
Given tulle’s transparency, wash-away stabilizers are the way to go. Avoid cutaway or no-show mesh stabilizers as they remain post-embroidery. Tearaway stabilizers? They might ruin your tulle and the embroidery while removing.
Picking the Right Tulle for Your Project
Tulle is soft, net-like, and comes with tiny holes. This translucent fabric is available in various shades, finishes like matte or shiny, and can be found in playful kids’ dresses to sophisticated evening attire. While tulle can be crafted from nylon, polyester, or silk, nylon tulle is common and what I used in this beginner guide. If you’re trying tulle embroidery for the first time, start with a sturdier variant before moving to the delicate ones. Pro tip: Luxurious tulle works wonders for lace embroidery!
Top Tips to Ace Embroidery on Tulle
- Choose dense designs that pop on tulle but won’t tear it or the stabilizer. Extremely dense designs or mere running stitches might not be ideal.
- Always use the smallest hoop that fits your design for the best results.
- If your tulle feels too fragile, hoop only the stabilizer and lightly adhere the tulle using a temporary fabric adhesive. Avoid pins unless necessary!
- Slow down the stitching speed for precision, especially when experimenting.
Embroidering on Tulle: A Quick Guide
Start by marking your design placement on the tulle using a water-soluble fabric pen. Hoop your tulle and stabilizer, ensuring it’s taut but not distorted. Place your hoop in the machine, select your design, and ensure the right orientation. Remember, a slower stitch speed helps in precision. Once done, trim the jump threads, remove the tulle and stabilizer, and trim close to your design. Rinse to remove the stabilizer and let your masterpiece dry! Voilà!
Key Takeaways
| Key Points | Details |
|---|---|
| Tool | Brother SE1900 |
| Fabric | Tulle (Nylon recommended for beginners) |
| Stabilizer | Wash-away |
| Needle | 75/11 Schmetz embroidery needle |
| Thread | 40 wt polyester (top) & 60 wt (bobbin) |