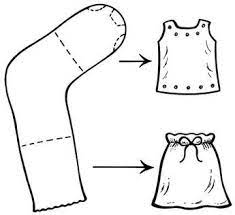
Attention aspiring fashionistas! Even if you don’t have a sewing machine or simply don’t feel like threading a needle, I’ve got you covered. Let me introduce you to a quick and easy method to craft an adorable no-sew baby doll skirt!
In just about 15 minutes, using only fabric, hem tape, elastic, and some basic accessories, you’ll have a skirt ready for your doll. Designed primarily for 18″ dolls, I’ve also included tweaks to fit other sized dolls too. Ready? Let’s dive in!
Materials You’ll Need:
- Fabric: Woven piece measuring 8″ x 21″. A rotary cutter and plastic ruler make cutting a breeze. Not sure which fabric to choose? There are many doll-friendly fabric types to explore.
- Hem Tape: 5/8″ width, like the Stitch Witchery I used.
- Pressing Tools: Both an iron (I swear by my Steamfast mini-iron) and a pressing surface (tailor’s board, in my case).
- Elastic: A strip measuring 11″ of 1/4″ width.
- Insertion Tools: A bodkin or a simple safety pin will work for the elastic.
- Measuring Tools: A seam gauge or similar measuring tool. My go-to is the 14-in-1 measuring gauge.
- Scissors: Any sewing scissors will do.
Note: The width of hem tapes can vary. Adjust your seam and hem allowances based on your chosen fusible web width. And if you prefer not to double fold your hems, you can tweak the fabric length accordingly.
Customize for Different Doll Sizes
I designed this pattern using an Our Generation 18″ doll whose measurements are quite similar to many American Girl dolls. If your doll’s size differs, here’s a quick guide:
- Start by measuring your doll’s waist circumference. Multiply this number by 1.75 to determine the fabric width.
- Next, decide the desired skirt length. Add 2 7/8″ to this number to figure out the total fabric length.
No-Sew Skirt Crafting Steps:
1. Side Seam Fusion
Begin by folding the fabric right sides together until it measures 10.5″x8″. Place an 8″ long hem tape strip where the raw fabric edges meet. Use an iron to fuse the seam following your hem tape’s instructions. Flatten the seam by pressing both sides. For a neater finish, trim the seam with pinking shears.
2. Crafting the Hem
I adore double-fold hems as they neatly tuck away fabric edges. Start by folding the bottom 1/2″ of the fabric upwards, wrong sides together, and press. Then, fold up another 5/8″ and insert hem tape within this fold. Iron to fuse the hem in place, ensuring the tape adheres properly over the earlier seam.
3. Creating the Elastic Waistband
For the waistband, you’ll make an elastic casing. Fold the top 1/2″ of the fabric downwards, wrong sides together, and press. Repeat with a larger 1 1/4″ fold. Insert fusible hem tape around the bottom edge of this fold but leave a 1.5″ – 2″ gap. This gap allows for elastic insertion. Press to fuse.
For elastic insertion, use a bodkin or safety pin attached to one elastic end and pull it through the casing. Ensure the elastic is evenly distributed and not twisted. To finalize, you can either overlap the elastic ends and secure with a small hem tape piece or tie them together in a subtle knot.
Finally, use a hem tape piece to close the casing opening and distribute the elastic uniformly throughout the casing.
Voila! Your Skirt is Ready
I hope this guide brings a touch of style to your doll’s collection. For more fashion adventures, explore patterns like the 25 no-sew doll outfits, numerous free sewing patterns, Barbie-specific patterns, and detailed doll clothing tutorials. Happy crafting!
| Details | Description |
|---|---|
| Time Needed | 15 minutes |
| Main Material | Woven fabric |
| Specialty Item | 5/8″ Hem Tape |
| For Elastic Insertion | Bodkin or Safety Pin |
| Measurement Tool | 14-in-1 Measuring Gauge |

