
Want to give a twist to your plain fleece or knit beanie? Try adding your own embroidery design! This DIY touch can transform a simple beanie into a unique piece for your cold-weather collection.
Though beanies’ stretchy nature makes them a challenge to embroider with machines, fear not! I’m here to guide you through the process and tackle any hurdles along the way. Let’s dive in!
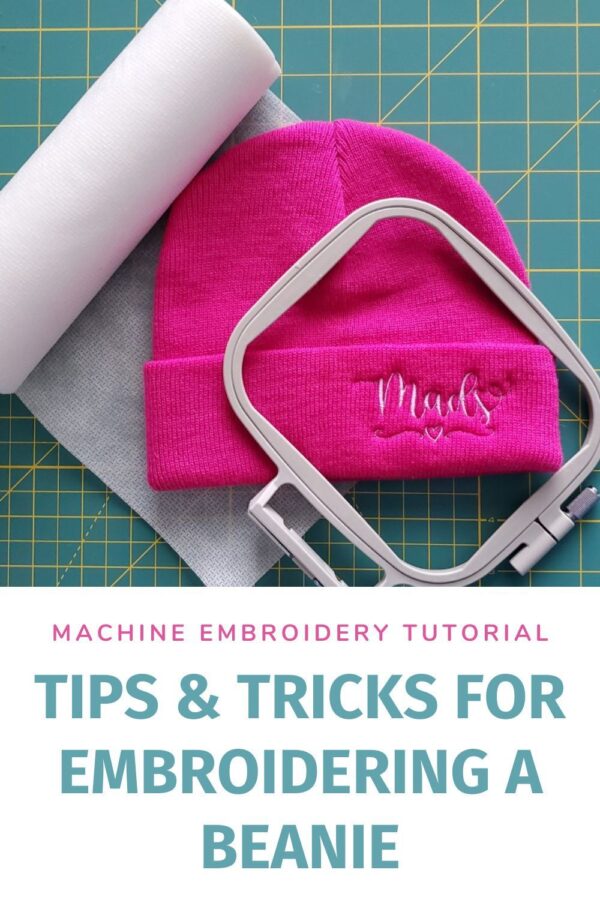
Essential Tools for Beanie Embroidery:
- Embroidery machine (I trust my Brother SE1900) with a small hoop
- Machine embroidery thread (For my creations, I prefer 40wt polyester thread on top & 60wt white bobbin thread)
- 75/11 Schmetz embroidery needle (Alternatively, consider a ballpoint needle for improved stitch quality)
- No-show mesh cut-away stabilizer
- Water-soluble stabilizer (I swear by Sulky Solvy!)
- Embroidery scissors/snips
- Useful pins and clips
- Fabric marking tools and a ruler for precision
Choosing the Right Stabilizer for Your Beanie:
Whether you’re working with a fleece or knit beanie, the top choice of stabilizer is the cut-away or no-show mesh (PolyMesh) stabilizer. It ensures the beanie retains its shape during embroidery, especially for intricate designs. Even if it remains inside after the embroidery, if your beanie has a fold at its base, it’s all good!
For those crafting on single-layer beanies, choices might vary. A tear-away or wash-away stabilizer could work for simpler designs. However, if you face issues with stitch quality, consider switching to cut-away. Adding a water-soluble topping also helps the stitches pop and not get buried in the beanie’s fabric.
Design Ideas & Selection:
Given the challenge of embroidering on beanies, picking a cooperative design is crucial. From branding logos to initials, monograms, and even festive patterns, the options are vast. For one of my pieces, I used fluffy fabric and crafted a heart applique. When choosing, ensure your design isn’t overly dense, especially if you’re resizing it. It’s also beneficial to opt for designs that aren’t too geometric, as any misalignment will be less noticeable.
Beanie Embroidery Process:
- Design Placement: Use a water-soluble fabric pen for light beanies and a chalk wheel for darker ones. Ensure your design’s center aligns with your desired position on the beanie. Don’t forget to mark the top of the beanie to avoid orientation mistakes!
- Preparing the Beanie: I generally prefer to float beanies over the stabilizer instead of hooping them. You can use a temporary fabric adhesive to attach the beanie. For better positioning, a basting box can be added.
- Embroidery Machine Setup: Once your design is loaded and the hoop is in place, make sure no extra fabric is trapped under the hoop. Also, double-check the orientation, thread color, and needle before starting the embroidery.
- Final Touches: Post-embroidery, take the beanie out, trim any extra stabilizer, remove basting stitches, and wash off the stabilizer. Let it dry, and voilà, your personalized beanie is ready!
Key Takeaways:
| Aspect | Details |
|---|---|
| Best Stabilizer | Cut-away or No-show Mesh (PolyMesh) |
| Design Tips | Choose non-geometric and less dense designs |
| Embroidery Process | Mark, float, set up machine, and add finishing touches |