
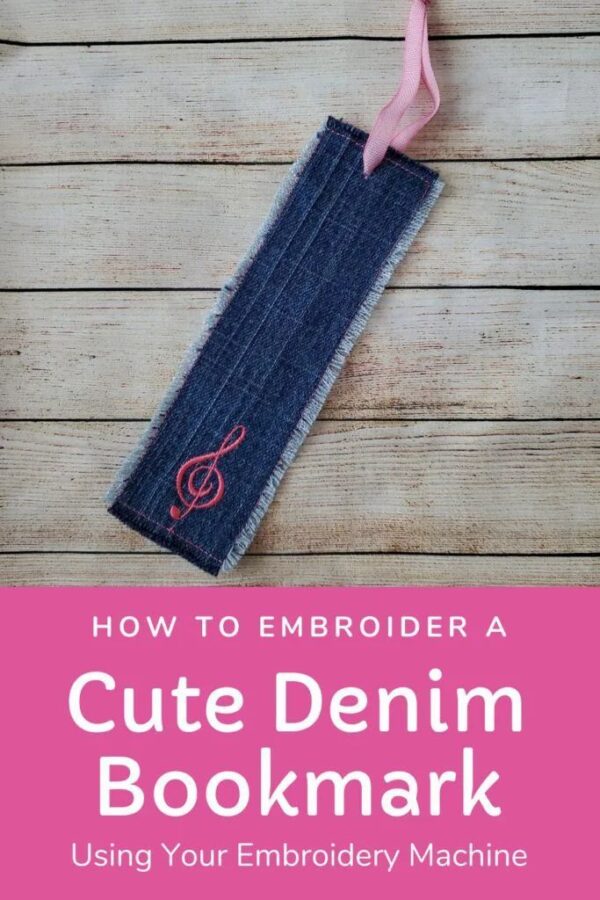
Discover how to breathe new life into an old pair of jeans by crafting an adorable denim bookmark. Not only is this project a great way to recycle, but it also makes for a thoughtful gift. I crafted one as a potential Christmas present for my daughter’s preschool music teacher. Even though we couldn’t finish the school year due to the pandemic, it’s a sweet token of appreciation.
Materials You’ll Need:
- Denim from old jeans or a denim fabric piece
- Embroidery machine stabilizer
- Your embroidery machine & suitable thread (I opted for a 100% polyester embroidery thread)
- Needle (I used a 75/11 embroidery needle which worked wonders!)
- Temporary spray adhesive (Odif 505 was my choice)
- Thin ribbon and a tiny pin
Choosing Your Design & the Right Stabilizer:
Although I used specialized software for my design, the beauty lies in the simplicity. You can create your bookmark using shapes already available in your machine. Begin with a large rectangle and add an eyelet stitch or a small stitched circle at the top. Following that, pick a design from your machine or import one of your own.
Remember, the type of stabilizer you pick will depend on your denim’s stretchiness and the stitch design’s density. For instance, I tried both a tear-away stabilizer and PolyMesh. The latter proved superior, especially with my stretchy jeans. If stabilizers baffle you, I have a handy embroidery stabilizer chart to guide you!
Embroidering Your Denim Bookmark Step-by-Step:
- Start by flattening out the denim. I typically cut along one of the leg seams to achieve this.
- Next, hoop your stabilizer at the bottom and place the denim on top. I sprayed Odif 505 adhesive and used a mediumweight PolyMesh stabilizer. But, fusible or self-adhesive stabilizers work too. Ensure they mesh well with your design and denim. If hooping challenges you, I’ve got a tutorial for that!
- Once you’ve ensured your threads and needle compatibility, stitch your design. No need to be overly precise with centering – imperfections add charm!
- After stitching, unhoop your project and trim around the bookmark, leaving about 1/4″ edge. Trim the PolyMesh stabilizer from the backside too.
- For a rustic look, gently tug threads from the bookmark sides. It’s strangely satisfying! Once done, even out any uneven threads with scissors.
- Last touch: Using an eyelet punch, create a hole at the bookmark’s top. Thread a ribbon through it, pinning it first for ease. Knot the ribbon to finish it off.
Key Details At A Glance:
| Material | My Recommendation |
|---|---|
| Embroidery Thread | 100% polyester |
| Needle | 75/11 embroidery needle |
| Adhesive | Odif 505 |
| Stabilizer | PolyMesh cut-away |