
Embroidery enthusiasts like myself always prefer using hoops for machine embroidery. However, there are moments when hooping just won’t do. Think about thick fabrics like those bulky towels or super delicate materials. They either can’t fit into the hoop or get damaged when you try. And then there are those small designs or items tinier than the hoop itself. The best approach here is to float your fabric above the hoop frame. ✨
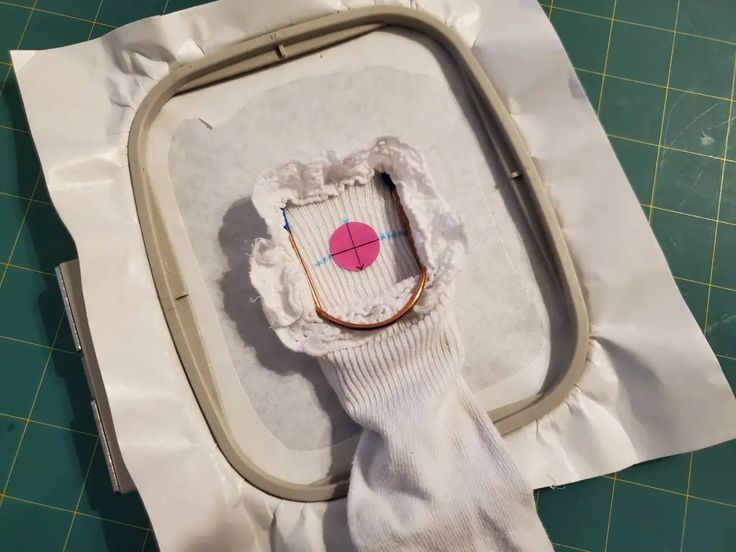
If you’re new to the embroidery world, I’ve got your back! In this post, I’ll walk you through how to float your fabric for machine embroidery. Plus, I’ll delve into the art of floating an additional piece of stabilizer beneath your hoop when necessary.
Six Methods to Float Fabric for Embroidery
Before anything else, ensure your stabilizer is securely hooped between the inner and outer frames. If you’re a bit lost, you might want to check out the basics of hooping fabric first. Once that’s done, lay your item to be embroidered atop the stabilizer. Now, to prevent it from shifting during embroidery, I use one of these six methods:
- Temporary Fabric Adhesive Spray
This magic-in-a-can is my staple for countless projects. Spray a bit on the front of your stabilizer and smoothly lay your fabric on it. But remember – don’t overdo the spray, always use it in open spaces (it can be strong!), and keep your workspace neat from any leftover sprays. - Painter’s Tape, Embroidery Tape, or Masking Tape
These tapes can be a great ally for holding your floated items. For instance, they’re perfect when you need that additional grip after using an adhesive. But a word of caution: ensure the tape doesn’t leave any sticky marks on your embroidered piece. - Sticky Self-Adhesive Stabilizer
Want something more direct? Try sticky stabilizers. One side reveals a sticky surface once you peel the backing off. I was skeptical initially because of the cost, but the convenience is unmatched! No sprays or tapes required. It’s especially handy for items like hats, ribbons, and even unconventional materials like balsa wood! - Pins
For added grip, pins are the way to go. Ensure they don’t tear through your stabilizer or interfere with the stitching process. And always test first to avoid leaving any marks on your fabric. - Basting Box
These are simple rectangles of elongated stitches that your machine can create to hold the fabric. Once your design’s done, simply remove them. But do ensure they don’t damage your chosen fabric, especially delicate ones like leather or paper. - Fusible Stabilizer
This takes a tad more effort but is worth it. One side can be fused to your embroidery blank. Once you’ve hooped it, you can press your item onto it. I find it especially useful for quilts and certain delicate items that might shift during the embroidery process.
Magnetic Hoops: An Honorable Mention
While not strictly about floating, magnetic hoops deserve a shout-out. They’re a game-changer, especially when working with quilt layers or bulky materials. Several options are available, each with its unique benefits, so it’s worth exploring!
Floating that Extra Stabilizer
At times, you might realize you need more stabilizer mid-project. Did you know you could float it? Just slide it under the hooped stabilizer but above the embroidery arm. After a few initial stitches, it’ll be secure.
| Method | Use Case | Notes |
|---|---|---|
| Adhesive Spray | General embroidery | Use in ventilated areas |
| Tapes | Additional grip, top layers | Ensure no residue |
| Sticky Stabilizer | Hats, ribbons, unconventional materials | Direct application |
| Pins | Extra hold | Check for marks |
| Basting Box | General embroidery | Test for fabric damage |
| Fusible Stabilizer | Quilts, delicate items | Secure with iron |